


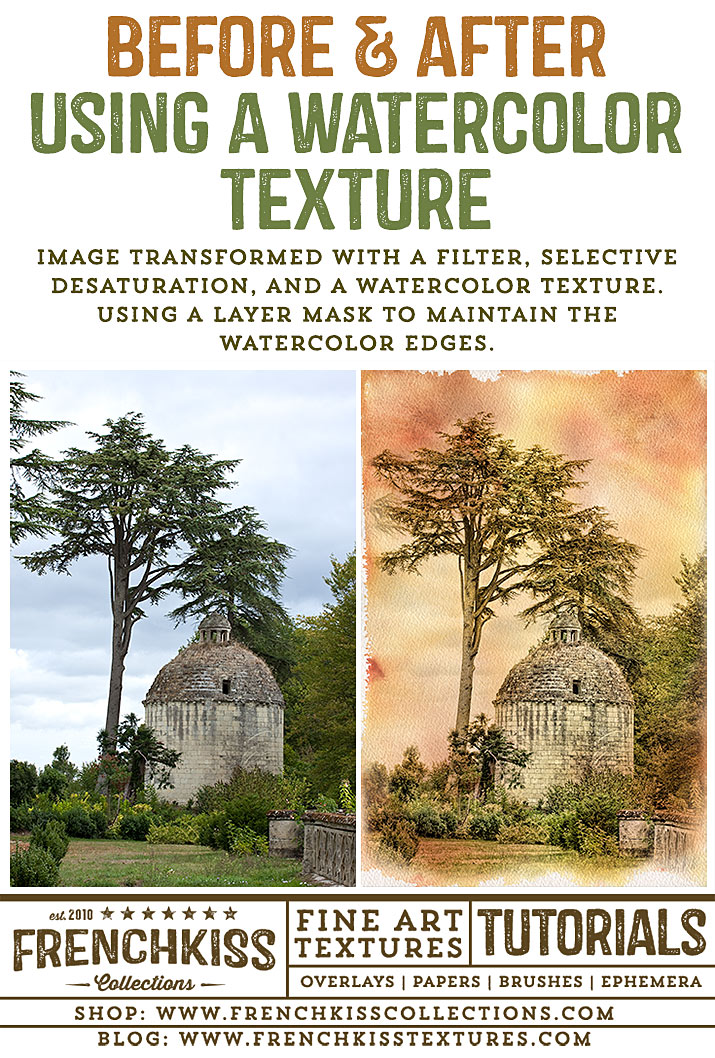
This photograph of a French tower was created with filters, selective desaturation, and the addition of a watercolor texture. Intermediate to advanced level tutorial.
Processing The Photograph
In the illustration above, the photograph on the left is my photograph with only an exposure adjustment from Lightroom.
Photograph Specs:
- Photograph © 2009 Leslie Nicole
- Loire Valley, France
- Canon 40D, tripod, ISO 100, f/13.0, 1/30 sec.
Preparing The Photograph
I wanted to give this image a slightly washed out, vintage feel but with a lot of detail so that it’s slightly closer to being an illustration. I probably could have done a better job in Lightroom giving this image better contrast, sharpness, clarity and less vibrancy, but *Topaz Labs filters tend to be my go-to filters for post-processing.
To be honest, as images often are, this grew out of trying various things, so it’s possible it has more steps than is needed. The important goal was an image that was open in the shadows, had crisp details, an over-all desaturated look, and since the texture would be adding density, I wanted a hi-key image. You don’t have to use filters, you could also achieve the look with Lightroom setting or even Photoshop.
The Post-Processing
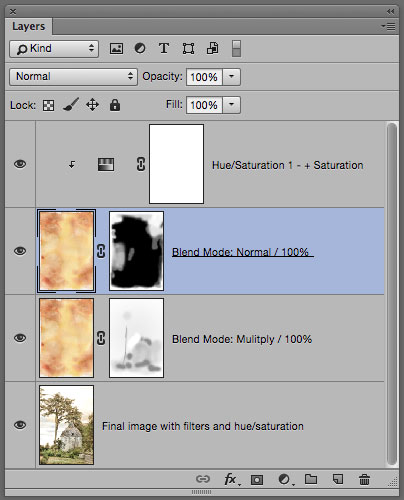
- Shown Below Left: First, I applied a *Topaz Labs Adjust Filter. This was Neutralizer preset (from the Adjust 4 preset list).
- Then I used a Hue/Saturation Adjustment Layer. The hue is warmer with much less saturation. I selectively applied the effect with a layer mask. See the layer panel below.
- Shown Below Right: Afterwards, I applied the *Topaz Labs Clarity filter, with the preset Architecture/Brick House.

Layer Panel For Post-Processing
Note how the Hue/Saturation adjustment layer is applied selectively using a layer mask. The black areas indicate the areas that I wanted to retain the colors of the *Topaz Labs Adjust / Neutralizer layer.

Adding The Texture
The texture is used twice. In the first instance, the Blend Mode is set to Multiply to be an overall blend with the image. It is duplicated and the Blend Mode set to Normal - with selective masking - this allows the watercolor edge to remain pure and not blend with the image. See the comparison image below.
- The texture is a watercolor texture from the Autumn Rain texture collection.
- The texture was placed in the photograph document and sized to fit exactly.
- Texture Usage 1: Above the image layer. Blend Mode: Multiply, Opacity: 100%. Slight masking.
- Texture Usage 2: Blend Mode: Normal 100%. The layer mask was set to 100% black (choose the layer mask and fill it with black) then painted with white. This allowed the edges and a little bit of the clear areas of the image to have a much stronger texture and to maintain the watercolor edge details.
Edge Comparison
See the difference it makes duplicating the texture and setting it to a Normal Blend Mode.

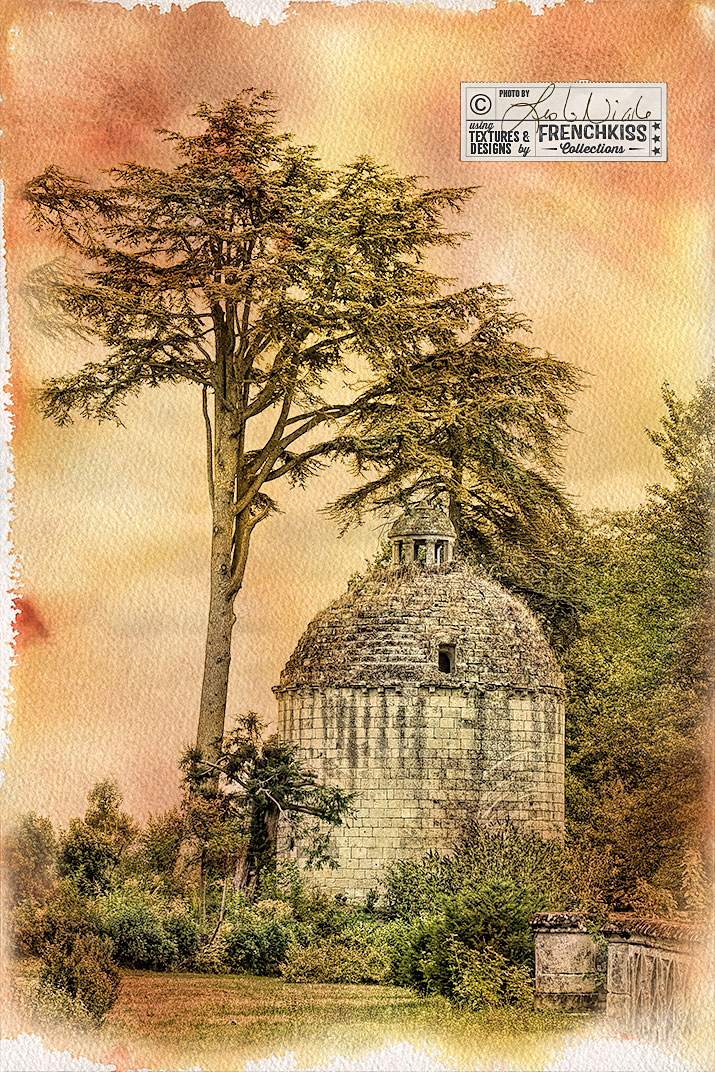
The Final Image
Resources
* Topaz Labs Filters is an affiliate link. I get a small commission from any sales resulting from a click from this site (at no extra cost to you.) I really do love these filters. Nearly all of my own images use one of these filters. Thank you for supporting the site!
Hey Leslie!
Love this tutorial! I noticed you went back to Topaz. For awhile you were using OnOne which I could never really embrace. I like this effect a lot, especially the tip about retaining the edges. I have always struggled with this and you have broken the code! Thanks as always for your generosity.
Thanks, Flo! Topaz has always been my mainstay, but I use a lot of different filters. On One is sometimes fun. I actually use them a lot more for design effects than photo effects. I also use the Nik and Alien Skin filters. The Topaz though are usually my “Go To” filters. 🙂
How did you get the torn edge look? Love this image and keep coming back to it to get inspiration.
Lorelei Bryan recently posted..Hello world!