

I’m really loving the combination of scanned flowers and the *Topaz Labs Impression filter.
Scanography
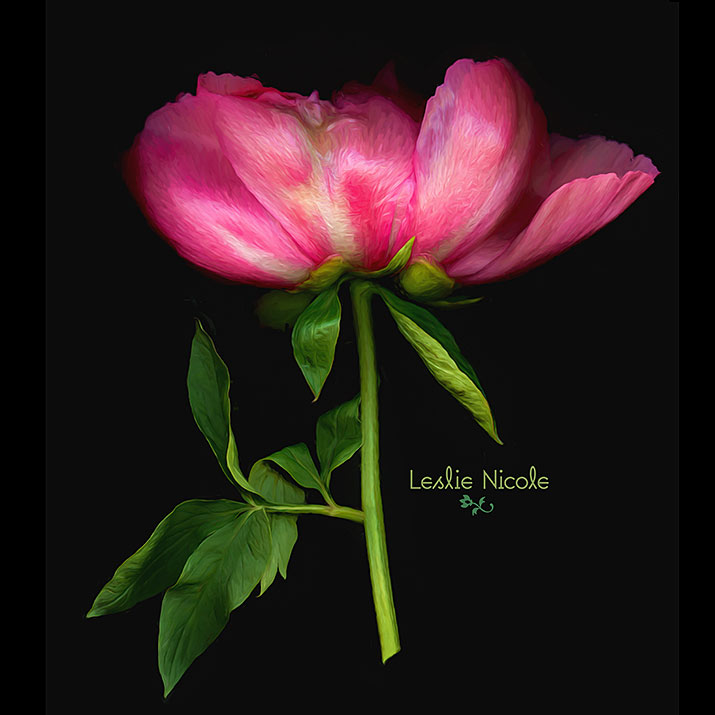
I’ve dabbled off and on with scanography or scanner photography. I’ve gone back and forth between loving the combination of delicious detail with haunting shallow depth of field and being frustrated by working “backwards”, the limits of perspectives, and the dust! I do, however, regularly use the scanner to capture flatter plant parts and flowers to use as design elements. See example below.
This week, I had a bouquet of peonies in the studio and being frustrated with the constant changing light in my studio (drifting clouds) for photographing, I decided to give scanning another try. I’ve been on a scanning craze all week!
A Few Tips On Scanner Photography
I’m not an expert in this method, but here are a few tips:
- My Scanner: I have an Epson Perfection V750 Pro scanner. I’ve also used an Epson Perfection V500 and thought the quality was very good for its price point.
- Protecting The Glass: Be careful if you place rough items to not damage the glass. I’ve heard of some people putting down a protective clear sheet, but I’ve found this to greatly increase the dust problem.
- Dust and Hairs: The bane of scanner photography is the dust! Count on cleaning your scanner bed frequently. I keep a spray bottle of lens cleaner and a soft cloth for cleaning glasses/lenses. I spray the cloth and wipe down the glass between each scan. I first use my soft cloth to gently swat away with debris left from the previous plant so I don’t risk grinding seeds against the glass. Also count on having a lot of retouching to do in Photoshop no matter how much you clean.
- Black Background: I built a black cardboard box to lay over the scanner bed. Some people just leave the scanner lid open, but in my bright studio this only works at night.
- Placing Items: It’s a bit aggravating to work backwards, but you start to get the hang of it. I try to make sure the leaves are turned so the side I want see in the scan are facing the glass. I also try to carefully arrange petals so that they aren’t folded. I’ve also often propped up the flowers to get a better angle and so that the petals aren’t as smashed. Tip: you may need to scan twice - once for the flower area and once for the stem.
- Cheat! I am not above scanning the plant in sections and putting it together in Photoshop. I’ll even steal parts from one plant to add to another or retouch out parts I don’t want. The peony above has a leaf from another peony! By cheating, I can get more of the plant if I want, and get the best angle for the flower and then a better angle for the stem. I don’t always do this. Part of the beauty of the method is the contrast of detail and blur, but use it if you need it!
- Patience and Serendipity: You may need to do several scans to find just the right placement of leaves, etc. There’s also a bit of luck. Sometimes one plant scans beautifully and another doesn’t.
- Photoshop Editing: After retouching out the dust and cleaning up the black background, I use the *Topaz Labs Clarity filter to bring out the contrast, detail and saturation of the plant. I also use the *Topaz Labs Impression filter as indicated below. I love the look of adding a slight painterly touch to the image.
As I mentioned, I’m a beginner in this method, so if you want to learn more, you may like to search YouTube or join some Flickr or Facebook groups.
Capturing Less Dimensional Items
As I mentioned above, I do regularly use the scanner to capture less dimensional objects. These seed pods from a Judas tree were scanned to use in axial symmetry designs. When I scan to use as design elements, I cover the objects with a large sheet of white paper and maybe a black sheet over that to block the light from behind. If your white paper isn’t opaque enough, use several sheets or the black paper will effect the white. Now that I have a black box constructed, I place that over the white paper.
The great thing about this method is that you can get fantastic detail and control over the final size. The drawback is that the background is never all white and there will be shadows. There is work involved in cutting out the items from the background. I’d love to figure out a way to back light the scan! I need to see if it could be done like lightbox photography with the scanner being the camera.
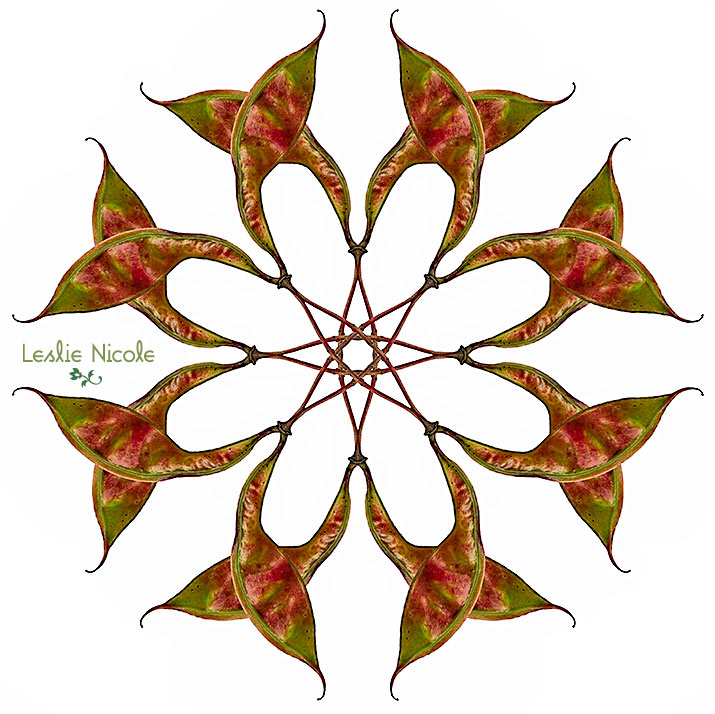
Scanned seed pods used for an axial symmetry design. Topaz Labs Detail filter.
Topaz Labs Impression Filter
I’m a huge fan of *Topaz Labs Impression filter which gives a more traditional artistic feel to artwork with presets such as Painting and Pencil. In the peony above, I used the Impression preset: Impressionistic/Van Gogh II at 80% opacity.
Resource
*Topaz Labs Filters is an affiliate link. I get a small commission from any sales resulting from a click from this site (at no extra cost to you.) I really do love these filters. Nearly all of my own images use one of these filters. Thank you for supporting the site!

American Photographer and Designer living in France with my French husband, 2 Weimaraners and Cat Rescues. Camera, Mac, studio, garden.

What a cool effect! Thanks so much for sharing 🙂
Hey Leslie, the peony scan looks amazing!
Would you mind sharing what kind of scanner you use? When I scan anything that isn’t laying 100% flat on the flatbed some areas appear blurry, and those petals in the back look so crisp!
Hi Greta, I’ve updated the post with more information. Part of the crispness is luck on this particular image! I think the Topaz Labs filters help to define the petals better too.
gorgeous - thanks for sharing
Amazing! Will have to try scanning flowers!
Are you saying that you just laid a flower down on your scanner and took a scan of it? Is there more to it than that (as far as the scanning goes?
I have done some scannography but your image is stunning Leslie! thanks for sharing your method:)
Thanks, Irene!
Thank all of you for your feedback and questions! I’ve updated the post with more information.