I prefer using flattened illustrations with white backgrounds vs. cut outs when I use a vintage illustration in my designs when I want to integrate the illustration into a background.
Digital Vintage Postcard Illustrations
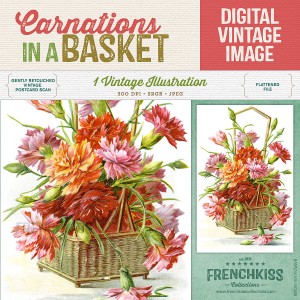
I collect vintage postcards. I love the beauty and whimsy from the golden age of postcards, from the late 1800’s to the early 1900’s. Fortunately, these are also in the public domain, so we are free to use them in our artwork. I’ll often retouch these postcards and change the background to white as I find I can integrate them easier into my designs that way. I know that many designers will cut out the illustration and provide transparent .png files and these are great for certain uses, but the original illustrations almost always have shading and coloring in the background that are impossible to include in a cut out version. I love that shading and coloring because it gives depth to the illustration.
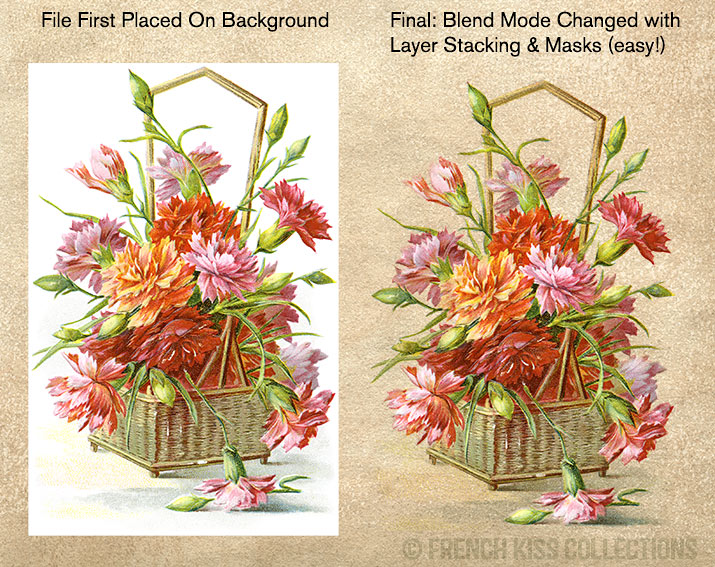
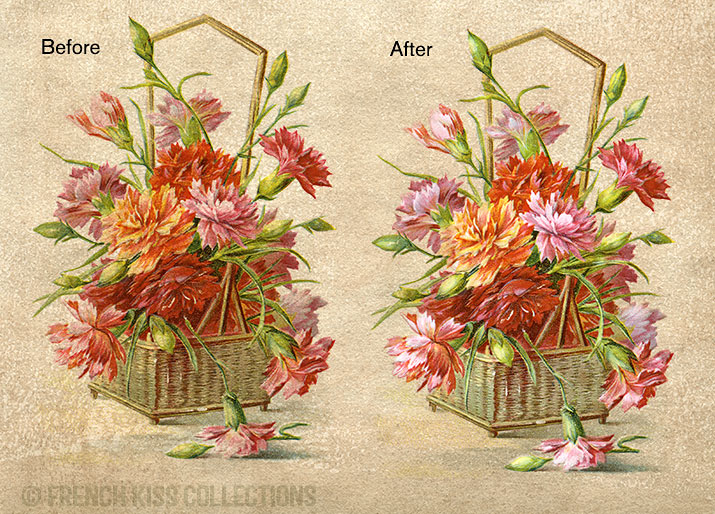
When you first place a file with a white background into your design, you may wonder how the heck to you go from what it looks on the left below to how it looks on the right. You may think you need to do the cut out yourself, but unless you are looking for a cut out “sticker” design, there is a better way to do it.
Step By Step Instructions
Note: This is actually much easier than it’s going to sound below. I need to do a quick video for you, but as I have a cold this week I’ll need to add it later.
First, Create Your Layer Stack
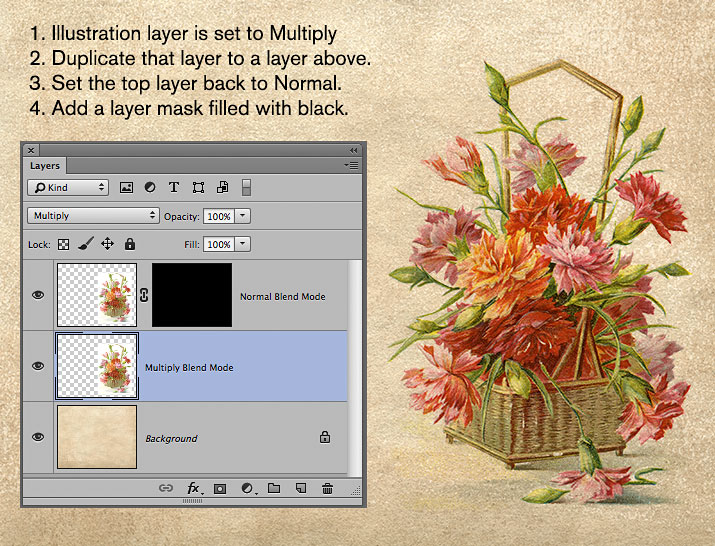
- Place your illustration with the white background onto your chosen background.
- Change the Blend Mode of the illustration’s layer to Multiply.
- Duplicate this layer to a layer above. Shortcut is command + J (Mac) or Control + J (PC)
- On the duplicate layer, return the blend mode to normal.
- On that same duplicate layer, apply a layer mask and fill it with black.
Shortcut is clicking the new layer mask icon while holding down the option key (Mac) or alt key (PC)
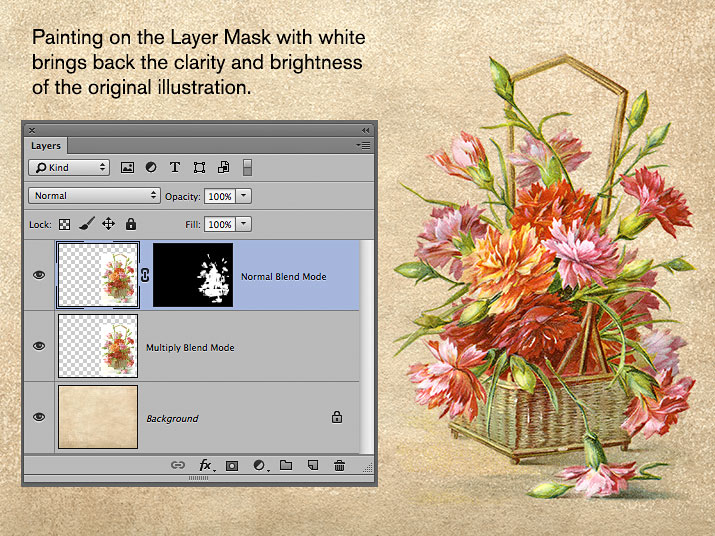
Now, you may be thinking, “Well, that looks more integrated, but it looks rather dull.” Ah Ha! The next step is where we bring back clarity and brightness.
Next, Bring In The Original Clarity And Brightness.
- Select the top layer that is set on Normal blend mode and click on the layer mask.
- Select the brush tool and then select the softest brush.
- Make sure the foreground color set to white. Shortcut is D on the keyboard and then X
- To start, set the opacity of the brush to about 40%.
- Start to gently brush over your image where the illustration is. You will be revealing the layer set to normal, thus you will bring back the clarity of the original.
- Change your brush size and opacity as needed. You may only need to do a little bit and you may need to do more. It just depends on the original and the background.
Important Tips
- Be careful not to brush into areas that have the white background. The image won’t need to be completely brushed in. Leaving the edges of the illustration to blend into the background will look better. If you make a mistake and the white background is showing, just switch your brush to black and paint it back in. Shortcut is X on the keyboard to switch the foreground and background colors.
- Gradate the opacity of your brush strokes. I’ll use a higher opacity in key areas like highlights and then fade out to lower capacities at the edges of the illustration.
- Chose a background that works. I’ll usually try to start with a background that is close to a tone in my illustration so the background isn’t overwhelming the image.
Before and After
I know some people get nervous about layer masks, but this is a really easy technique. It takes much longer to write about it than to do it! Once you familiarize yourself with the steps, this takes around 10–15 minutes to do and then you can save your results for re-use.
We now have a lovely integrated image on our background. See how much those shadows add to the dimension of the image?
Save your Layer Stack For Re-use
Now that you have this layer stack done, you can save it to reuse.
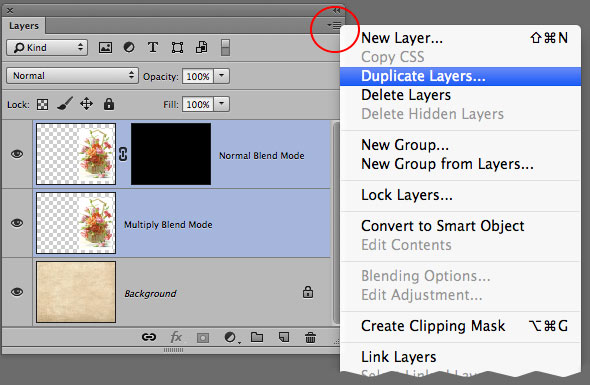
- Choose the two layers by selecting the first layer and then holding down shift as you click on the next layer in the layer panel.
- From the layer panel fly-out menu, choose Duplicate Layers. See illustration below.
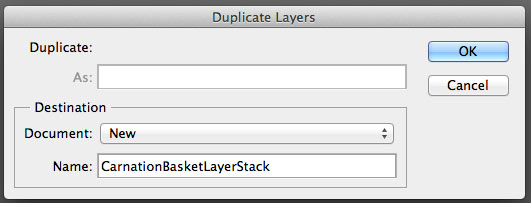
- In the Destination Document, chose New
- You can either name your new document here or after you create it.
- Save your new layers as a Photoshop file.
Why A White Background?
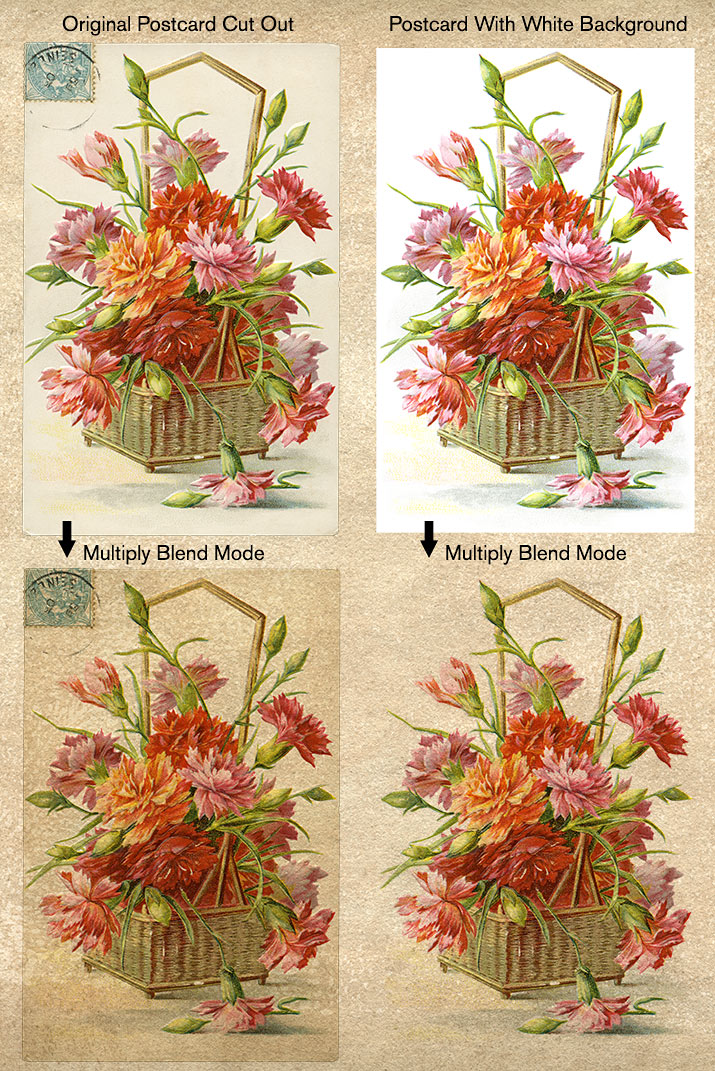
I thought it might be helpful to see how useful it is to have a white background. If you were to place the original postcard down and try the same thing, it wouldn’t be as easy. Note. you can still do it, but it would take extra steps and more work. (Future tut!)
Resource
American Photographer and Designer living in France with my French husband, 2 Weimaraners and Cat Rescues. Camera, Mac, studio, garden.


Thanks for this tutorial, Leslie! I was aware of some of these steps, but the mask filled with black is genius, and saves a lot of my self taught steps. I really appreciate it!
But how do you lighten the background without selecting the flowers?
Hi Lois,
I’m referring to the images I sell on my shop where I’ve already lightened the background. I do intend to follow up with a tut on if you want to lighten it yourself. I’m on a bit of a vacation at the moment. In quick instructions, I will select the lightest part of the background and use the white balance eye-dropper in Photoshop to make it bright white. I then go in with a white brush and clean it up more.
How do you make the background while without selecting the flowers?
I’d really like to try this tutorial but I’m stuck at the very beginning.
Thanks
What image are you using? Facebook would be a good place to submit an example and ask questions.
Thanks Leslie. I’ll switch to Facebook and also see what I can do on my own while awaiting your tut.
Have a wonderful vacation. My husband and I years ago vacationed for a month in France, just driving around looking at all the castles and staying in B&B’s. It was wonderful.
Lois
That should read “make the background white”. Sorry’
Lois