
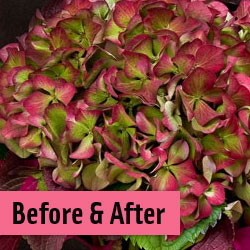

Before & After using Adobe Photoshop and Textures
I quite liked these coleus leaves tucked around this hydrangea. The original is photographed against a black background. Although it looks very rich and lovely in its own right, I wanted a version that was more painterly and warmer. I added three textures to get this background. Now, I still have the richness of a dark background, but the energy of the flower and foliage are reflected in the purple and reds of the background.
Note that my secret sauce ingredient here is the use of textures in the Normal blend mode. I often use textures set to Normal for greater coverage and intensity when the texture itself is an important part of the image and not just an enhancement. With this black background, I needed to mostly cover up the black, but I left a little bit coming through. The first texture is set at Normal 95%. I also used layer masks to reveal the bouquet and to let more of the black from underneath come through.
Original Image
Here is the original image with all my global and local adjustments. I’ve also applied the Topaz Labs Clean Filter.

The Final Image

The Layer Panel:

Bibliotheque
in French Kiss Texture Collection I
Blend Mode: Normal /Opacity: 95%

Bibliotheque / Les Textures 1
Datura Noir
In the l’Artiste Collection variations
Blend Mode: Normal /Opacity: 36%
Used again above at: Blend Mode: Overlay /Opacity: 67%

Datura Noir | Artiste Variations
Moulin Rouge

Moulin Rouge / Free
The download will start downloading in the background. Check your download location.
DOWNLOADBlend Mode: Soft Light /Opacity: 26%
Images and Textures © Leslie Nicole

American Photographer and Designer living in France with my French husband, 2 Weimaraners and Cat Rescues. Camera, Mac, studio, garden.

Why are some textures no longer available?
Deborah recently posted..Announcing the 4th Annual “Enchanted Moments” calendar theme portrait shoot!
I used to sell the textures as singles but when I made the collections, I had to edit some of them out to not have too many variations. Hmmm. Maybe I’ll add Moulin Rouge into the freebies. Thanks for pointing it out!
Thanks for this tutorial Leslie. I’m often stumped when trying to add textures to floral photos with a black background and usually end up abandoning it… So this will be very useful I’m sure…
Thanks so much for your generosity, Leslie! Your textures inspire me.
Thanks!