

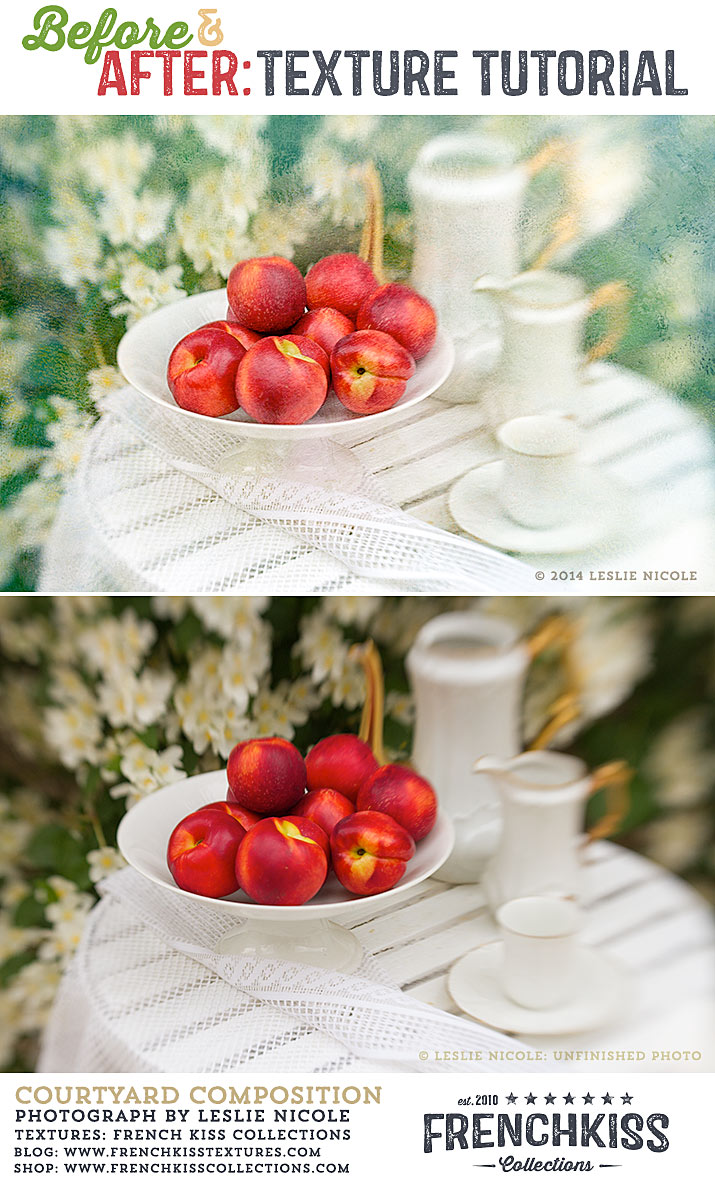
I had a request for the details on how I created this image with a Lensbaby image of nectarines in my courtyard with a texture effect.
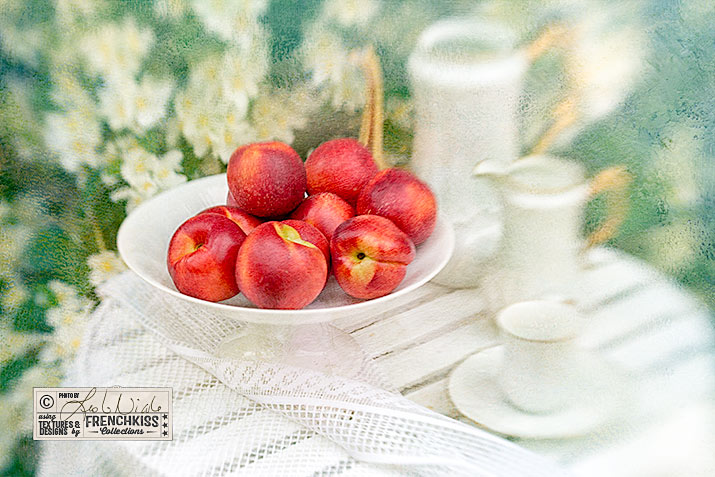
The Final Image
In case you want just the final image for sharing purposes!
The Elements
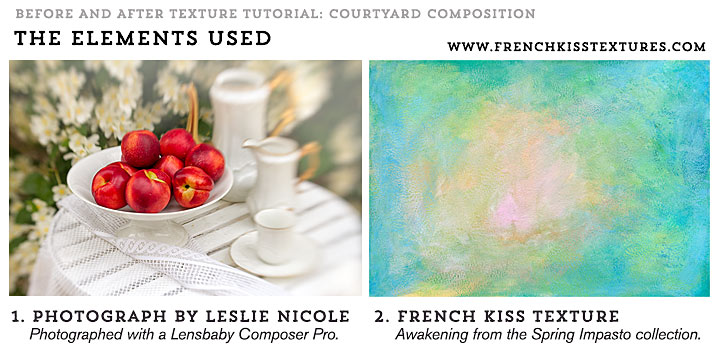
Just 2 Elements used:
- A photograph by Leslie Nicole: (Moi) Taken with a Lensbaby (see details in next section.)
- Texture: Awakening from the Spring Impasto collection.
The Photograph
The photograph was taken in my courtyard with a mock orange tree in bloom. I had just gotten my Lensbaby Composer Pro with the Double Glass Optic and wanted to try it out.
- Photograph © 2014 Leslie Nicole
- Camera: Canon EOS 7D
- Lens: Lensbaby Composer Pro with the Double Glass Optic
- Setting: ISO 320, 1/640 second. I don’t remember what the aperture was set to, but probably around 4.
- Hand-held, natural light.
Post-Processing.
If you look at the Before image in the first image in the post I’ll be the first to admit that it’s pretty ugly. I could have done better initial processing in Lightroom to get the exposure right and lighten up the shadows. I don’t remember why I didn’t. Perhaps I was in a hurry to play and wasn’t paying attention! The other thing to realize is that the texture will do a lot to change the tones. Before doing this tutorial, I decided to re-work the image using a “better” starting image, but that completely changed how it interacted with the texture. I didn’t like the results! Yes, the background was lighter and more saturated, but the image didn’t work for me anymore.
Have a look at the layer panel below for further details on the processing.
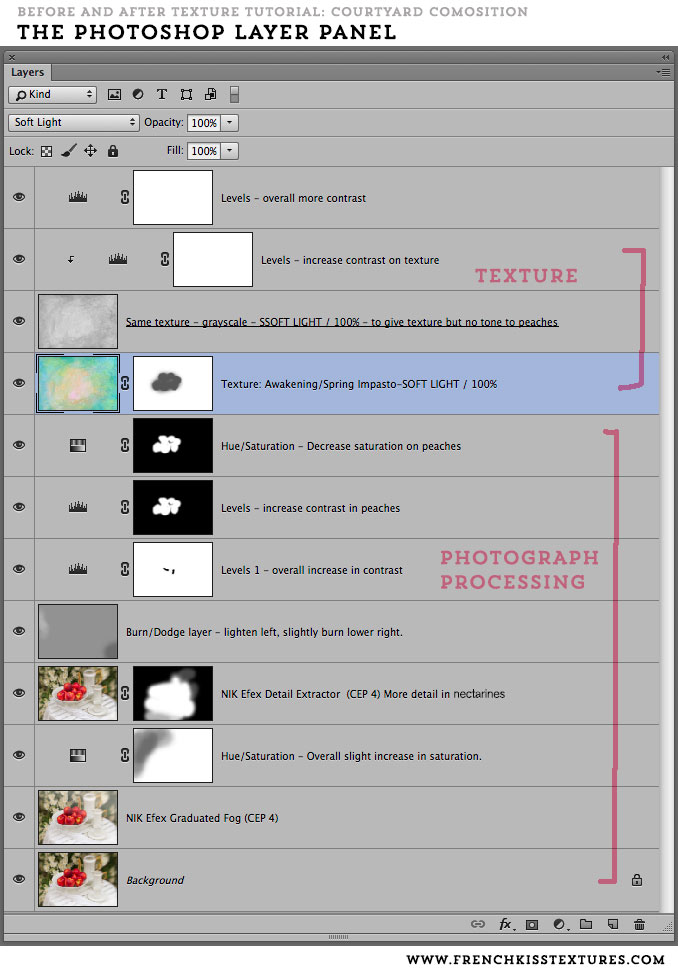
The Layer Panel
I’ve written descriptive notes on each layer. Remember that a real workflow is a push and pull of try this and try that. It’s not always ideal. As I noted above, I could have started with better overall adjustments in the image from Lightroom — although also note that I wasn’t able to replicate what I wanted with a “better” image. It turned out the slightly dark, under-saturated image worked well for this texture.
Notes:
- The Photograph: See the details in the section above. Note how the original photo is dark and under-saturated, but this works well when combined with the bright, saturated texture.
- The Photograph – processing filter 1. I used the Nik Efex Graduated Fog preset to lighten and further cut back the background. You get more of the texture effect in these areas as a result.
- The Photograph – processing filter 2. I then used the Nik Efex Detail Extractor preset to give the peaches more detail. Note how I used a layer mask to restrict this effect to the peaches and a bit of the foreground.
- The Texture: Awakening from the Spring Impasto collection was set to Soft Light at 100%. This brightened and saturated the image as well as giving it the painterly texture. The peaches were going too light and saturated, so I used a layer mask to remove around 25% of the texture from the nectarines.
- The Same Texture: I wanted more of the painted texture on the peaches, but I didn’t want as much tone from the original texture, so I duplicated the texture, set it to black and white and then set to Soft Light at 100%. (Oopsie on the typo in the layer panel!)
- Adjustments to the image and peaches: After I placed the textures, the nectarines were looking too washed out and also too saturated, so I did some selective adjustments with layer masks restricting the adjustment to the peaches. I’ve also done tone and contrast adjustments with levels both for the photograph and again overall with the texture.
The Top Take-Away Points
Probably the most interesting points to take away from this tut are:
- The texture will affect the tone, saturation, and contrast of the photograph.
- Use the same texture duplicated and changed to grayscale to still have texture but not the color of the original texture.
Used In This Tutorial

American Photographer and Designer living in France with my French husband, 2 Weimaraners and Cat Rescues. Camera, Mac, studio, garden.

This tutorial is terrific, extremely helpful. Thanks. Kate
Thank you so much for this tutorial. I’m fairly experienced with textures, layers, etc, but there are always things I’ve forgotten or didn’t know. Your tutorials are always helpful!
Thanks for your feedback, Barb.
The grayscale texture tip alone is with the price of admission Leslie!
Thank you!
Leslie, what a great tutorial! I’ve learned that it takes adjusting and playing to really ‘hit a home run’. You’ve done that. Thanks for sharing! Especially your Take Away Points.
Thank you for your feedback, Olivia!
Thank you for this tutorial, I loved.