

I recently purchased Viveza from the Nik Collection. (Formerly Nik Effects.) I’ve been loving how easy it is to dial in settings exactly the way I want. The preview is excellent. It’s quickly becoming the starting point (after basic Lightroom edits) for most of my post-processing.
If you haven’t heard yet, Nik Effects was purchased by Google and the price has dropped dramatically! It used to be over $400 for the entire bundle and it’s now only $149!
Check it out Here.
Before & After with Viveza
Below, you can see the preview window of edits in progress in Viveza. The image on the left is mostly Straight Out of Camera with slight adjustments in Lightroom for basic exposure. Note, I could have gotten this better in Lightroom, but sometimes you don’t see just how flat an image is until you start adding contrast!
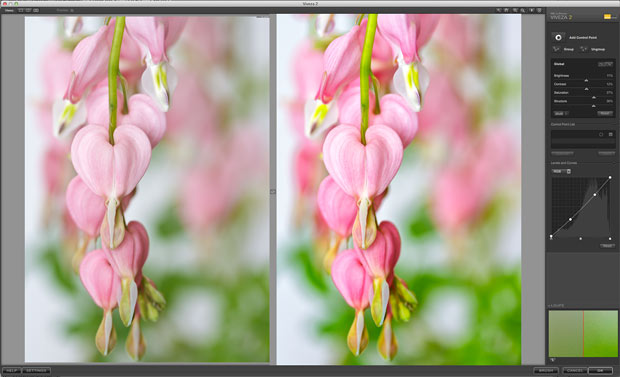
Using Viveza
Below is an enlarged view of the settings. There is an option to use control points to target areas of the image, but for this image, I just did global settings of brightness, contrast, saturation, structure and I tweaked the curves a little bit to further dial in the contrast.
Settings for this image.
Here are larger views of the Before & After:
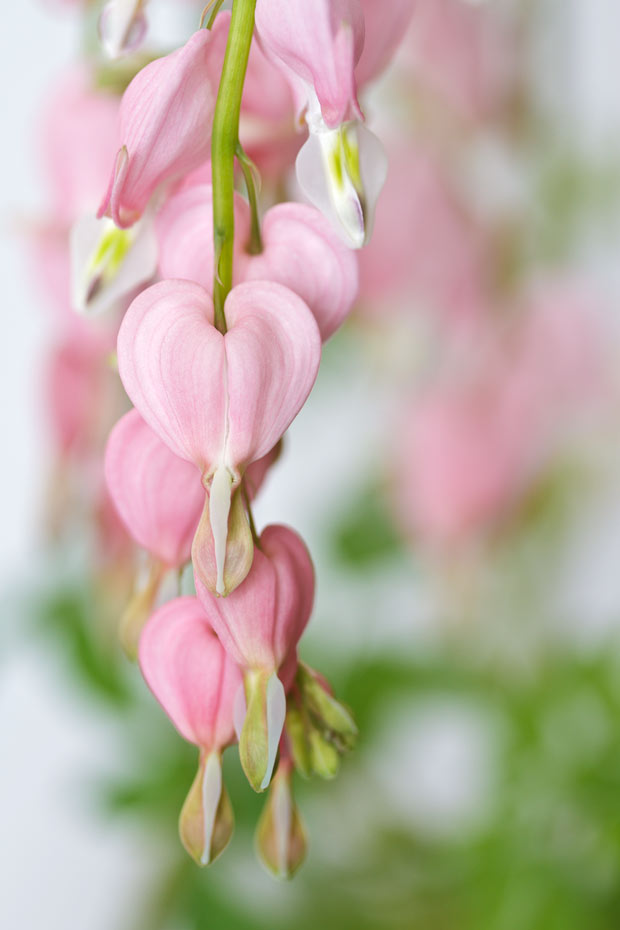
SOC image
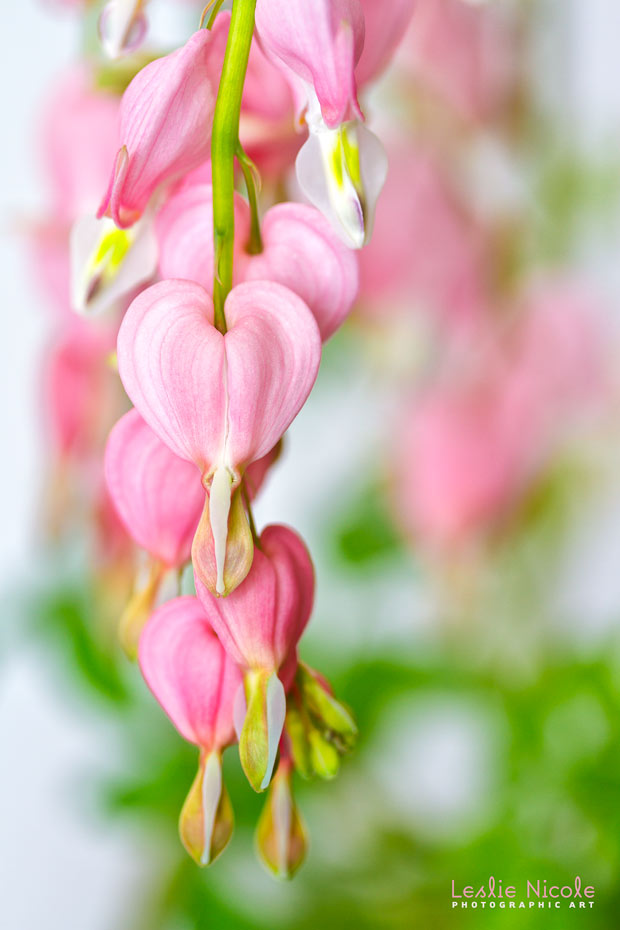
After Viveza
Finally, I did a little selective burning and dodging with a burn/dodge overlay layer in Photoshop.

Final Touches

American Photographer and Designer living in France with my French husband, 2 Weimaraners and Cat Rescues. Camera, Mac, studio, garden.

Beautiful photo! I’ve been using NIK Color Efex and Silver Efex for a few years now — how does Viveza compare? What’s different from Color Efex?
I was processing pictures with your textures yesterday — they came out beautiful!
Best, Elise
Elise Wormuth recently posted..Gallery of Photos
I hear Nik is even giving people rebates who recently bought the program. I know one person who bought it in January and get a rebate on the price difference. Got back more than $275.00. Beautiful what you did with the flowers above. Very pretty.
Thank you! I bought Viveza recently, and got a notice that I was eligible for the rest for free! I actually did a search for Scams as I was afraid to click the link at first.
Beautiful example Leslie.
I already had Nik HDR and Nik Color Efex and then Google gave me the rest of them for free!
Go ahead and go for it, Leslie, it’s legitimate. I have the whole suite now in both of my Photoshop versions, and I’d bought Color Efex back in 2010 for my Capture NX2!!! I’m really enjoying the new software very much!!! Thanks for your tutorial on this!!!
Lois Bryan recently posted..Dewy Pink Asters by Lois Bryan
Use coupon “HDRsoftware15” and pay only $126.65.
Just bought it 😉
Viveza is one of my favorite filters to use with my florals. I love that you can target the adjustments so precisely and the results are always subtle but visually powerful.