by Leslie Nicole | Feb 27, 2021 | News
The French Kiss Collections Blog will be moving from WordPress to our Shopify store. In the meantime, apologies for this transitional phase! Why We Are Moving Having a WordPress blog and a Shopify store has proven to be too challenging. I love the power of a WordPress...
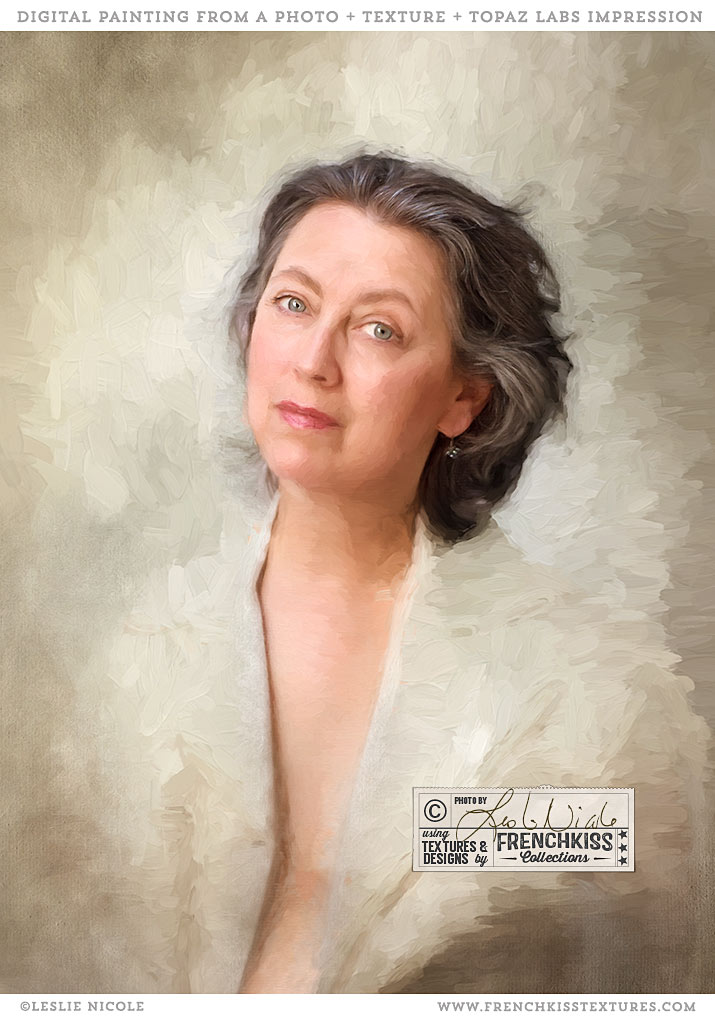
by Leslie Nicole | Sep 29, 2017 | Before & After, Inspiration, Photoshop, Using Textures
Here is a self-portrait I did with textures added and then finished with the *Topaz Labs Impression painterly filter. Original Photograph And Textures Self portrait photograph: (taken in 2014) taken with my Canon EOS 5D Mark III and the Canon 85mm f/1.2L lens. I did...
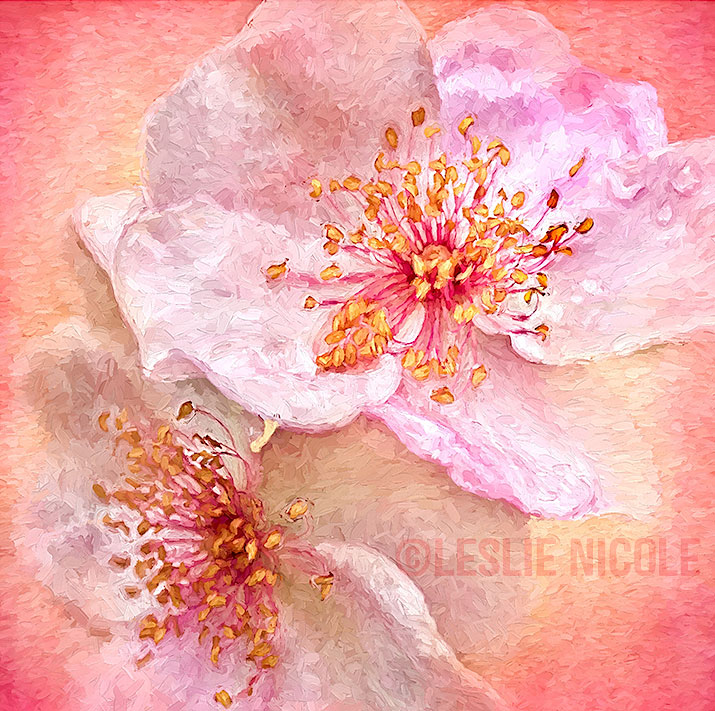
by Leslie Nicole | Sep 22, 2017 | Before & After, Inspiration, Photography, Photoshop, Using Textures
I love combining a photograph, a texture, and the Topaz Labs Impression Filter to create a digital painting. The Original Photograph Usually, when I create textured florals, they are photographed in the studio with a plain background which will make it easier to apply...

by Leslie Nicole | Jun 9, 2017 | Inspiration, Photography
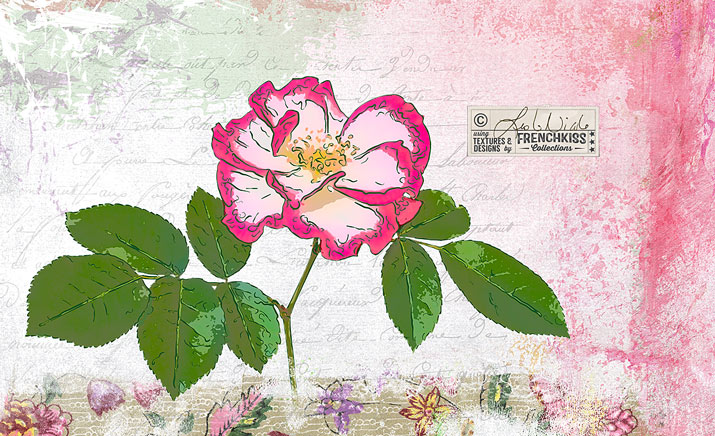
I’m really loving the combination of scanned flowers and the *Topaz Labs Impression filter. Scanography I’ve dabbled off and on with scanography or scanner photography. I’ve gone back and forth between loving the combination of delicious detail with...

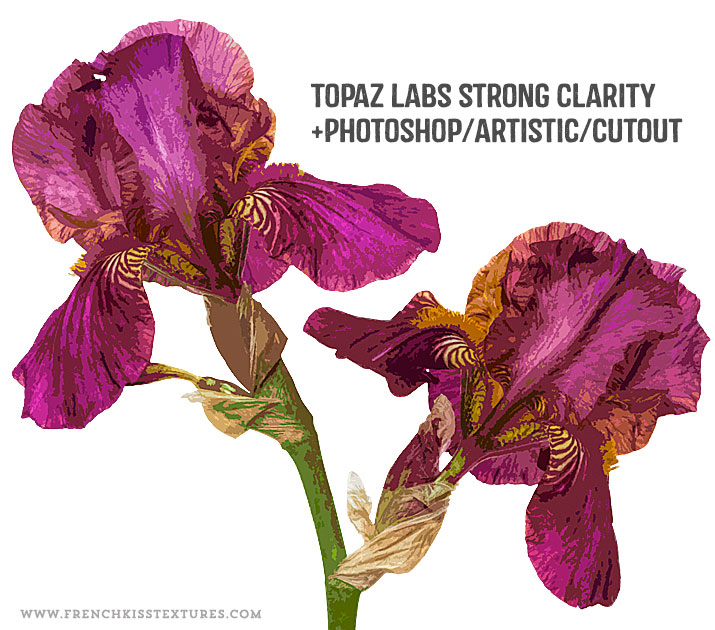
by Leslie Nicole | Jun 2, 2017 | Photoshop
In the last post where I showed you my Photoshop filter exploration on an iris photograph, one of my examples was using the Photoshop / Sketch / Stamp filter. In this post, I want to show you how I used that filter result with a texture to create a design element....
by Leslie Nicole | May 23, 2017 | Photoshop
In the last post, I showed you my set up for photographing an iris flower intended for my designs. In this post, I share my creative Photoshop filter explorations. The Master File I’m not going to go into great detail on my master file preparation -...
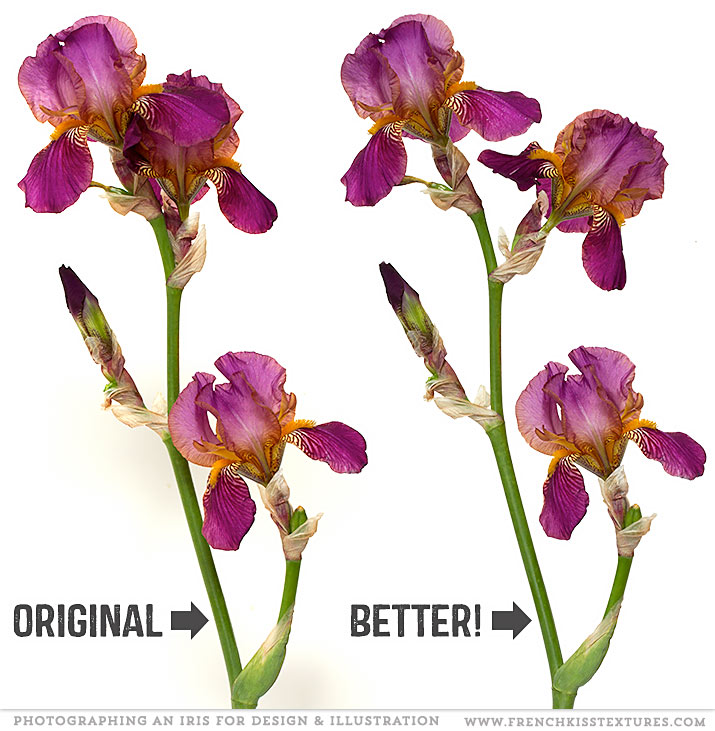
by Leslie Nicole | May 19, 2017 | Photography
When photographing a flower to create a motif for your designs or illustrations, you may need to cheat a bit. Manipulating An Iris For Photography This lovely Iris is from my garden. It was a beautiful flower, but the composition wasn’t quite working for...
by Leslie Nicole | May 10, 2017 | News
I can’t believe how long it’s been since I’ve posted here! You know how we sometimes go through rough patches in our lives? Well, 2016 was a humdinger for me with a lot of challenges: personal loss, health issues, life questions, and business...

by Leslie Nicole | Nov 12, 2015 | Photography
A few tips for picking and prepping flowers and plants before photographing them. Includes choosing plants, when to pick, basic clean up, and creative edits. The roses in the featured image above were perfect as is. If I’m walking in the garden and see a...
by Leslie Nicole | Oct 30, 2015 | Design, Photography
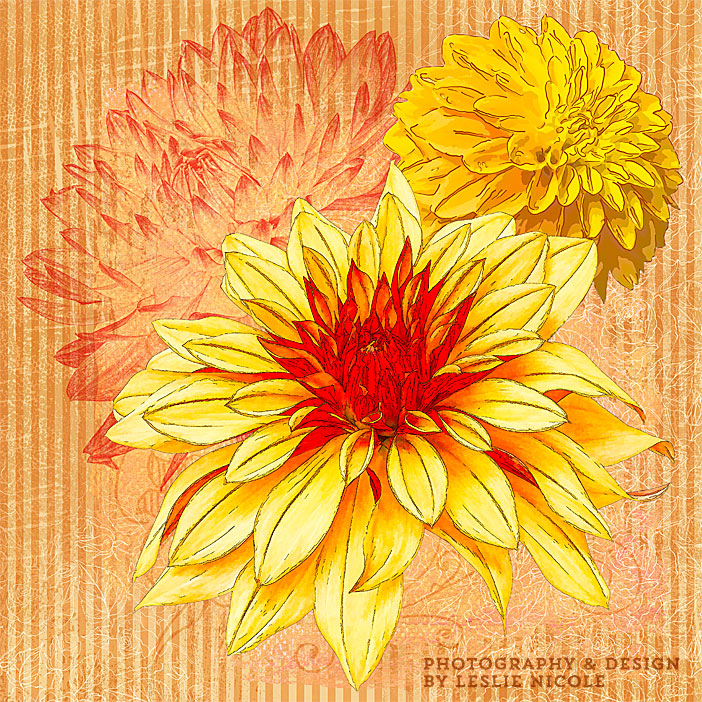
The teaser for a series of posts on photographing flowers and plants and post-processing in Photoshop and Illustrator as design elements and illustrations. Photography to Post-Processing Teaser These days I’ve been obsessed with photographing (mostly) my dahlias...

