

In this 4th and last part of the tutorial, we are going to put all the elements together to create our final photo illustration.
The Components For The Illustration
In part 1, I showed you how you will need 3 layers for the illustration.
- A Background Layer. Plain white works, but a lightly textured background is even better.
- A Color Image. In part 2, I covered creative options to prepare your color image.
- A Line Illustration Version of the Color Image. In part 3, I showed you several techniques for creating a line illustration of your color photograph.
The Steps
The Background Layer
Open up the texture or digital paper that you will be using for your background. I recommend choosing a background that is fairly light and subtle.
This texture is Serene, lightened and desaturated from the French Kiss Les Textures 3 Collection.

Placing The Color and Line Illustrations.
If you’ve been following along in the tutorial parts 1–3, you should have a document that has your color image and your line illustration together. Depending on the method you chose, you will have either 1 color layer and 1 line illustration layer or you will have 1 color layer and 2 layers for the line illustration.
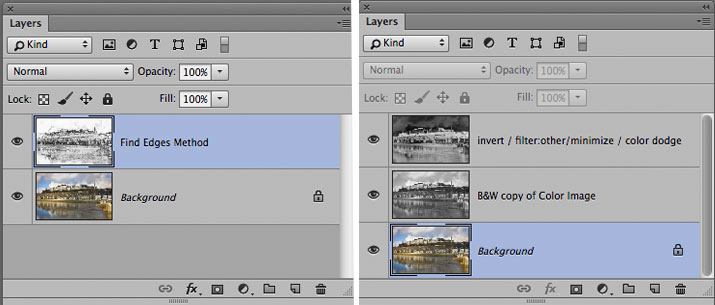
You may have 1 or 2 B&W layers depending on the method you used to create the line illustration.
Drag All Layers To the Background Document
Whether you have 1 or 3 layers, drag all the layers into your open background document:
- Select all the layers by holding down the SHIFT key while you select each layer.
- Still holding down the SHIFT key, drag all layers to the background document. Holding down shift as you drag will ensure that they are placed centered onto the background.
- If you have 2 black and white layers, select both of them (remember to hold down shift as you chose each one.) and merge these two layers. Command + E (Mac) or Control + E (PC).
- Drag the color image layer to the top layer position.
- For now, turn off the color image layer.
Your layer panel should now look like this:
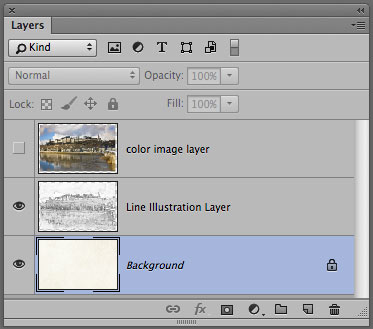
Your layers should be in this order.
The Line Illustration
We’ll now create the base of our illustration with the line drawing layer.
Add Guides
Let’s add some guides. (Note: this step isn’t essential, but it is helpful.)
- First make sure you have on Snap To Layers selected. Menu/View/Snap To/Layers.
- Turn on the Rulers: Command + R (Mac) or Control + R (PC)
- Drag out guides from the rulers until they snap to the edge of the line illustration. Do this for all sides.
Blend Mode
Change the blend mode of the Line Illustration Layer to Multiply.
Load Watercolor Brushes
Load up some watercolor brushes. (Tut: Installing and Using Photoshop and Elements Brushes.) I like using some watercolor spots and spatters. I loaded up French Kiss Watercolor Spots 5 Brushes and French Kiss Watercolor Spatter 2 Brushes. Note: any brushes will work. Watercolor brushes are just an option that works nicely.
Choose a watercolor spot brush and hover it above your illustration to see it’s shape and placement. You may need to make the brush smaller by clicking on the left bracket key or bigger by clicking on the right bracket key. If you don’t see anything it’s either because the brush is still too big or you may have your Caps Lock button on. Turn off Caps Lock if needed and resize the brush to be smaller than your guideline area. Tip: to get your brush size small enough to visualize, change the size to a little smaller than your document width and then use the bracket keys to fine-tune the size.
At this point, don’t actually stamp the brush, just check the placement and shape by looking at the preview of the brush. Try to stay within the guide lines of the photo illustration layer.
Below, I’ve taken a screen grab showing the faint outline of the brush preview and I circled around it in pink. You can also see the guides set up at the edges of the illustration. You’ll see why I’m having you do this in the next step.
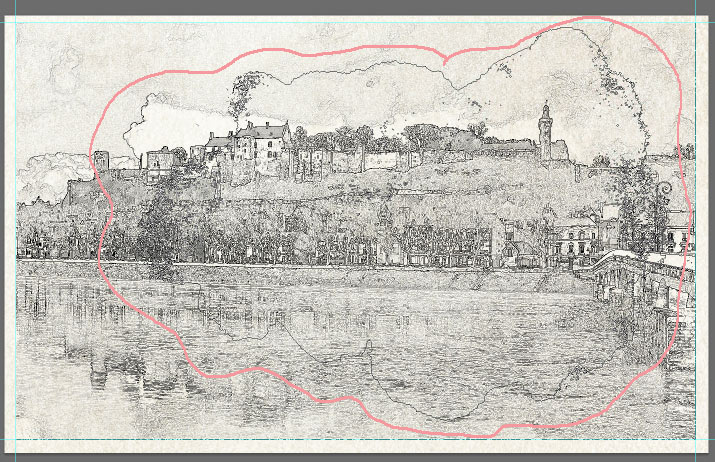
Brush preview hover shape outlined in pink.
Add a Layer Mask
- Select the Line Illustration layer.
- While holding down the Option (mac) or Alt (PC) key, click on the New Layer Mask icon at the bottom of the layer panel. It’s the dark rectangle with the white circle in the middle. This will place a layer mask filled with black. The Line Illustration will disappear. Don’t worry this is what should happen.
Use The Watercolor Brushes In The Layer Mask
- Make sure you have still have the brushes selected in the toolbox (shortcut is B) and that you have the layer mask selected in the layer panel.
- Make sure your color picker is set to white. (shortcut: D to take the color picker to the default Black/White and then X to bring the White to the foreground color.)
- Set to opacity of the brush to 100%.
- Choose a brush you want to try.
- Now, hover your brush within the guides in roughly the same place you did in the step above. This is why I had you test your brush placement before we added the layer mask.
- Click with your mouse (or Wacom tool).
This is the illustration with the first brush click. Wherever you paint (or stamp) with white will reveal the line illustration.
The first watercolor brush stamp in the layer mask.
Continue to add brush clicks with different brushes revealing more of the illustration. Stay within the guides so that you don’t get a hard edge where the illustration ends.
Tips:
- Save your work regularly.
- If you get to a place where things are looking pretty good, but want to try more, think of either saving a snapshot (Photoshop History) of your work or saving a copy of the layer mask. I do this all the time. I’ll create a blank layer and copy the layer mask to it. option (Mac) or alt (PC) and drag the layer mask to the new layer. If I decide I totally blew it with my layer mask I can always replace the layer mask with the back-up layer mask.
- Vary the opacity of the brushes and use some spatter brushes along the edges. You can Use some watercolor drop brushes too.
- You can also reverse the brush to black and take away some of the illustration if you go too far. Shortcut is X to switch the brush colors.
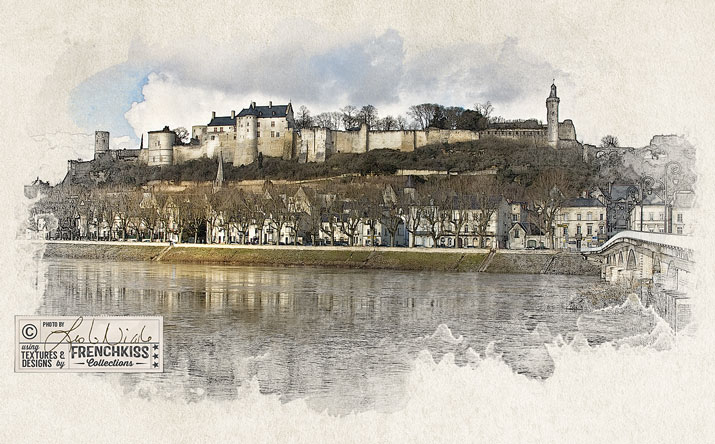
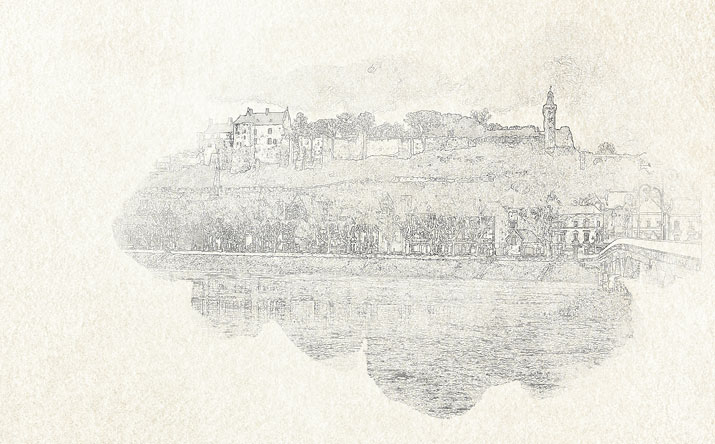
Here’s my final result this time around:
The Line Illustration with the layer mask.
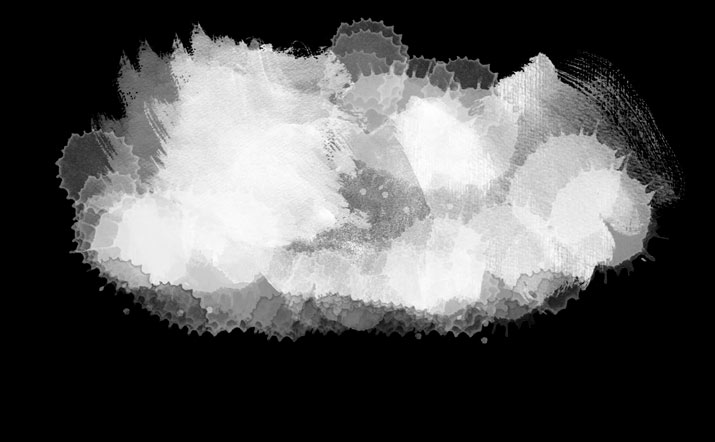
And this is what my layer mask looks like. As you can see, it’s not fancy.

Illustration Layer Mask.
Note: I ended up also using brushes from French Kiss Watercolor Spot 5 Brushes and French Kiss Dry Brush Brush No.1. Both of those have a lot of texture to them.
The Color Image
OK, now that the line illustration part is done, let’s add back some color. Now, the idea of this step is to add back color selectively, leaving a lot of the line illustration showing—especially around the edges.
- Turn on the Color Image layer.
- Set the Blend Mode to Normal. Note: you could also try Multiply or other blend modes to see if you prefer that effect.
- You may want to slightly lower the opacity of the layer. Mine was set to 80%.
Add a Layer Mask
- Make sure the Color Image layer is selected.
- While holding down the Option (mac) or Alt (PC) key, click on the New Layer Mask icon at the bottom of the layer panel. It’s the dark rectangle with the white circle in the middle. This will place a layer mask filled with black. The Color Image will disappear. Don’t worry this is what should happen.
Use The Watercolor Brushes In The Layer Mask
- Make sure you have still have the brushes selected in the toolbox (shortcut is B) and that you have the layer mask selected in the layer panel.
- Make sure your color picker is set to white. (shortcut: D to take the color picker to the default Black/White and then X to bring the White to the foreground color.)
- Choose a brush you want to try.
- Start with the opacity of the brush at 100%, but undo and change it if it’s too much.
- Use brushes that are smaller than the line illustration area. See tips above for loading the watercolor brushes if you can’t see a faint preview of the brush.
- Start with the center areas of the illustration being careful to leave areas that aren’t covered with color.
- Vary the opacity of the brushes.
- I like having a strong effect in some edge areas so you can see the watercolor shapes, but softer, more blended areas in other places.
- In addition to stamping with a brush, try painting with a watercolor spatter drop brush—one of the single splat or drop versions.
This is what my layer mask in the color image layer looked like:
Color Image Layer Mask
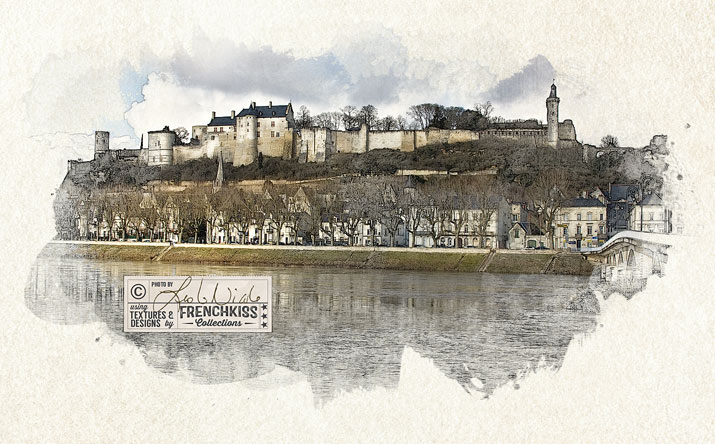
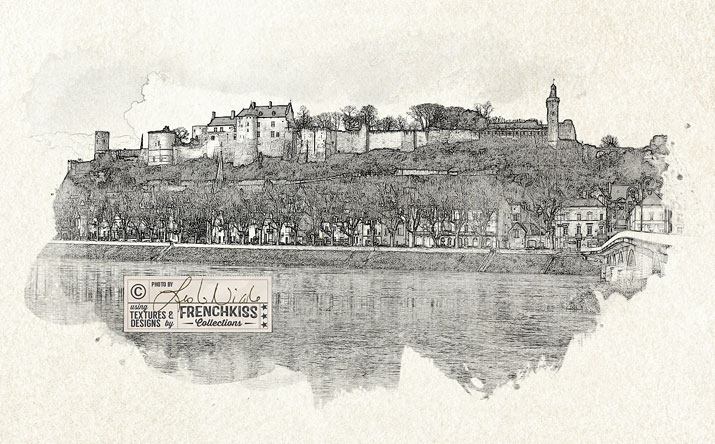
And here is my Final
Note: my original illustration was made several years ago, so it was hard to duplicate it exactly. This is a version with new layer masks.

Final Image (with new layer masks.)
Conclusion
All those steps may make this technique seem complicated, but it’s actually quite easy. Please do let me know if anything needs to be clarified for you. Have fun!
Resources
French Kiss Collections Watercolor Brushes and Overlays
Creating A Photo Illustration Effect Using Watercolor Brushes. A tutorial in 4 parts.
- Part 1: An overview of what will be covered.
- Part 2: Preparing the Color Photograph.
- Part 3: Creating the Black and White Line Illustration.
- part 4: Putting it all together and using the watercolor brushes. (This post)

American Photographer and Designer living in France with my French husband, 2 Weimaraners and Cat Rescues. Camera, Mac, studio, garden.

Hi Leslie,
I spent quite a bit of time with your four part photo to watercolor tutorials, they are very well constructed! It seems we have about the same taste and a fondness of for a wide combination of filters.
You never discussed your intended output much. I am prepping for a collection on large format water color paper, so I am thinking about foregoing the paper texturizing steps.
Any thoughts you have about outputting to large format watercolor paper would be most welcome.
Bests wishes,
Bob
I usually print on my Epson 3880 using fine art papers. I haven’t printed this one out yet though. At least not in one of these versions. I have the original printed out. Which paper texturizing step are you referring to – the background? Yeah, it would depend on your output – intentions what you wanted to do with the background. You’re right, a creamy, watercolor paper would give it enough color and texture. I tend to choose the hot press, smooth papers but there are papers with more texture. Those labeled “Torchon” tend to have a lot of watercolor paper texture.
Yes, I was asking about the background texture. like your example, I want my output to look like a watercolor… but mine are intended as prints. I guess I’m going to need to choose a paper to print on and do some test prints. That background layer is really meant to simulate watercolor paper right? So if I print on water color paper I should not use that layer? Or only lightly?