

When photographing a flower to create a motif for your designs or illustrations, you may need to cheat a bit.
Manipulating An Iris For Photography
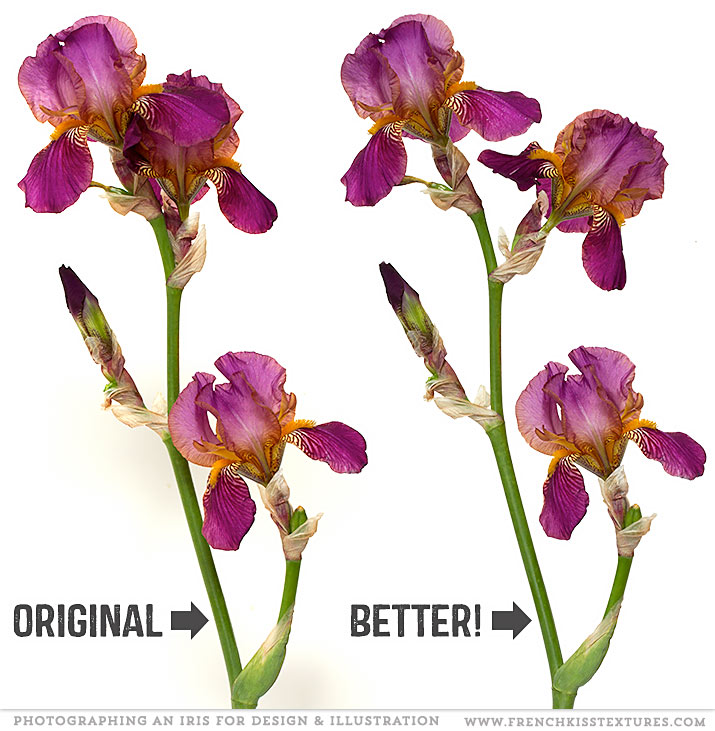
This lovely Iris is from my garden. It was a beautiful flower, but the composition wasn’t quite working for creating a motif for my designs. The top flowers were too bunched together and I wanted the bottom flower to have more separation from the stem. I needed to cheat a bit in both pre photography and post processing to get the look I wanted.
My Pre Photography Edits
- Not Shown: I’ve already snipped off dead flowers and checked for bugs.
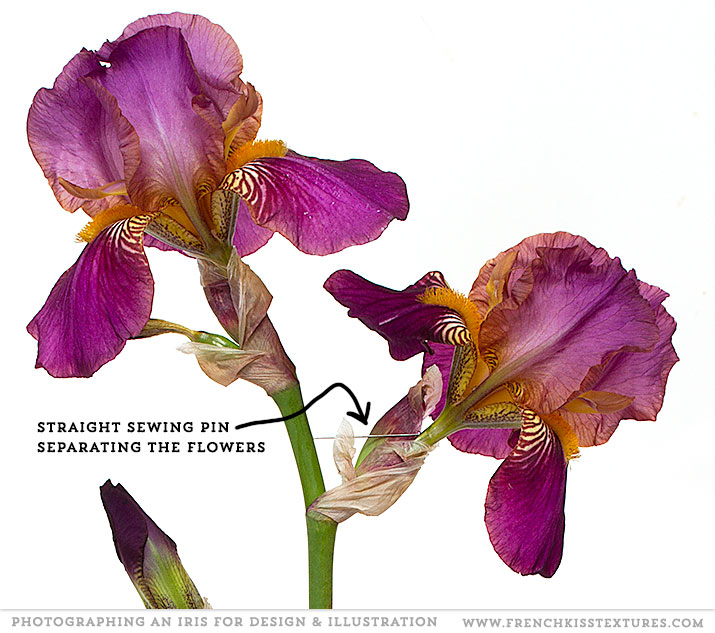
- Top Flowers: I used a straight pin to separate the flowers from each other. (See below.)
- Bottom right flower: I had to slightly break the flower at the base to make it separate. Fortunately, the break is hidden by the spathe. (Yeah, I just looked that up. It’s the covering.)
Set Up
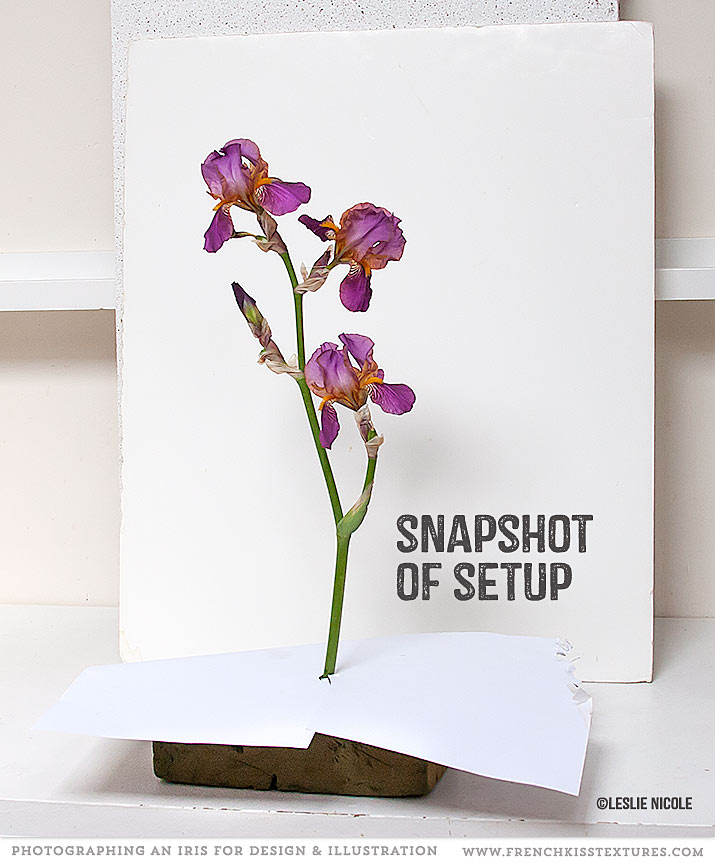
My studio has a lot of natural light with a skylight and 2 windows, but I do use some flash fill. I just propped up a foam core board as a background. The iris is set into one of those foam block thingies that florists use. A piece of paper with a hole cut in it covers the foam block so the stem is easier to cut out in Photoshop. Note: it would be better to use a large sheet of paper to create a seamless effect, but I didn’t have any more large paper. This set up does the job since I’m cutting out the background anyway.
Photo Notes
- Canon 7D
- 60mm Canon Macro
- f/11 , 1/6, ISO 100
- Tripod, mirror lock exposure.
- Natural light and bounced flash fill.
Post Photography Edits
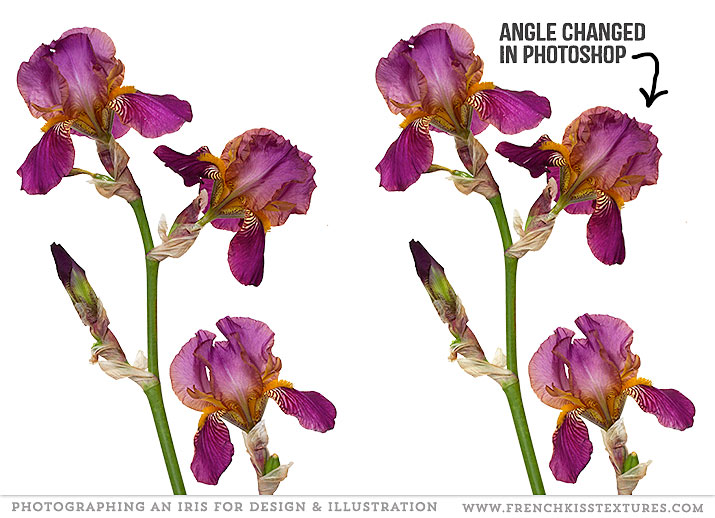
The top flowers ended up being a bit too far apart, so I put the top right flower on a separate layer and used the free transform tool to change the angle. It’s a subtle adjustment, but I think it does look more natural. I had a tiny bit of editing to fill in a small gap made by the angle change.
Additional Photoshop Edits
I won’t go into detail in this post, but all of my plant part images that are intended for design use get my standard edits for what I call my Master.
- Overall contrast: I use a Levels Adjustment Layer to bring the background to as close to pure white without compromising the flower.
- Basic Edits: I zoom in and retouch out dust, bugs, etc.
- Background Cut-out: I use basic Photoshop selection tools and the Refine Edge feature to separate plant photographs from the white background. (I only do this for flower photography meant for designs. I don’t do this for textured floral photography.)
- Topaz Lab’s* Clarity: At least 90% of my images are edited with Topaz Lab’s* Clarity filter. Plants usually get one of the Macro presets tweaked.
What’s Next
After I make my Master, I then explore filters to give a more artistic feeling to the “illustration.” In an upcoming post, I’ll be showing some of those filter effects. I’ll leave you with a little teaser.

Resource
Topaz Lab’s* Filters is an affiliate link. I get a small commission from any sales resulting from a click from this site (at no extra cost to you.) I really do love these filters. Nearly all of my own images use one of these filters. Thank you for supporting the site!

American Photographer and Designer living in France with my French husband, 2 Weimaraners and Cat Rescues. Camera, Mac, studio, garden.

Beautiful! Topaz is good. Maybe one day! LOL
Such helpful tips! Thanks so much, Leslie! I was just looking at an iris this morning and being bummed that the blooms were too close together for a great shot. Going to try your pin trick and also the free transform on a separate layer. Genius you are! Hugs
I’m back too! Always love your tutorials!
Thank you for the tutorial! Love your work!
Thank you for the tutorial, I love doing this sort of work and there are hints there that I hadn’t considered. Iris season isn’t far of here in Oz watch out blooms he’ll be on the prowl again
Compliments et merci, Leslie !
Thank you Leslie for this tutorial and I look forward to the next one. I have Topaz Simplify and love using it for edits.