

I wanted to show you how you may need to do some layer acrobatics with a texture in Photoshop to get the effect you want.

Final Image with textures

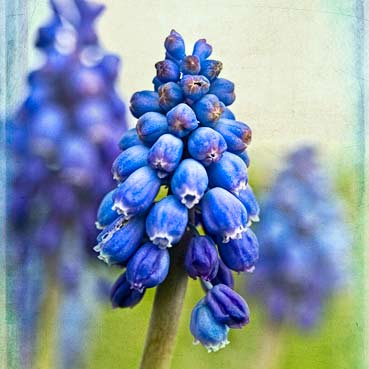
Image before textures.
Note: I’m no longer using image mouse-overs for the Before/After as they do not work on touch devices such as iPads.
I created this texture for a challenge on the Flower Works group on RedBubble. I wanted to have a little fun with it, so I gave it a very artsy border treatment. Looking for an image to use with it for the challenge, I came across this macro image I took of Muscari flowers. I had liked this image, but hadn’t found a treatment that worked. I thought this texture just might be the answer. When I applied the texture, it had promise, but I was losing some of the border treatment I liked, so I had to do a little creative levels acrobatics to get what I wanted.
Phase 1: Multiply only
Here’s my texture and the image in its first stage with the texture set to multiply. I like what’s happening on top, but I’m losing the border effect in the bottom colored area of the flower. (Resource for textures at end of post.)

French Kiss Texture, Fleurs

phase one with one texture layer set to multiply
Phase 2: Layer Acrobatics
Here’s my layer panel to show you what I had to do to get the effect I wanted.

Details
The Short Version
- I duplicated the texture layer that was set to Multiply and set it to a Blend Mode of Normal. I used a reverse layer mask to paint back in the border details.
- I then duplicated the normal blend mode texture layer and set it to Overlay to brighten and add contrast as the Normal blend mode can sometimes get a bit milky.
- I also used Hue/Saturation adjustment layers as a clipping masks to shift the colors of the texture.
The Long Version
Descriptions are from Bottom UP.
Base Edits
- As the texture has a white border surrounding it and I wanted to keep that, I placed the flower image smaller than the document area so it is just slightly larger than the actual texture area.
- The background layer under the flower layer is filled with white.
- I then selected the white border area on the texture layer with the magic wand tool. Then I selected the flower layer, inverted the selection and added a layer mask. The layer mask automatically applied the selected area as a mask. Now the flower image only shows where the actual texture is.
- I thought the Muscari image could use a bit of punch and sharpness, so I duplicated the layer, and applied a Topaz Labs Adjust filter (affiliate link). I decided it was a wee bit too much, so I changed the opacity to 34% so that the original image comes through a bit.
- Then I added a levels adjustment layer to add a bit of contrast.
Texture Edits
Multiply Layer
- The first texture layer is set at Multiply 100% (see above). It needed very little masking; I just took a little bit of the texture off the central flower.
- I decided to tweak the colors of the texture slightly using a Hue / Saturation adjustment layer as a clipping mask. I didn’t want to change the color of the yellow center part, so I masked out that area.
Normal Layer
- To get more of the border detail and to lighten the background of the image a bit, I duplicated the texture layer and set it to a Normal Blend Mode at 100%. I then placed a layer mask, filled it with black and brushed away with white to reveal areas of the texture. Being set to normal, I could bring out some of that border detail at the bottom.
- Note how I’ve also applied a Hue / Saturation adjustment layer as a clipping mask. I shifted the texture more towards green. As there is a layer mask on the texture layer, the color mostly gets shifted at the bottom of the image.
- I grouped this texture layer with the hue / saturation to keep the layer panel tidy and ended up adjusting the group opacity to 84%.
Texture Set To Overlay
- I thought parts of the image needed a bit if pep as the normal blend mode can get a little milky, so I duplicated the texture layer that was set to normal and set it to Overlay, which adds contrast and brightness. I originally had a Hue / Saturation adjustment layer on this, which is why I put it in a group, but ended up deleting the Hue / Saturation layer.
- I later adjusted the group opacity to 59%
Final Edit
- My last edit was to add another levels adjustment layer to give a little brighter highlights. I didn’t want the yellow center part to get brighter, so I masked the adjustment.
The Texture Greenhouse is in the French Kiss Texture Collection II

American Photographer and Designer living in France with my French husband, 2 Weimaraners and Cat Rescues. Camera, Mac, studio, garden.

Wow thanks Leslie for this info – so interesting to see how you’ve created your image and how you work with your textures.
Beautiful final result! Love it!
Cynthia