


There are a variety of ways you can create textures. For the purposes of simplicity, let’s say that there are two main ways to make textures. Either with brushwork in a program like Adobe Photoshop or you can start with an image.
Brushwork
You can create textures simply from brush work in a program like Adobe Photoshop.
This is an example I created purely with brushwork in Photoshop:

Here I used brushwork in Photoshop to create a textured look for this rose photograph.

Here are some great resources for brushes
Brusheesy has a great selection of brushes. Here are some of my favorites: Polder Sky, and Detailed Grunge pack.
PSHero This is a great tutorial and he gives you the brushes as a download. Photo Grunge Edges. Be sure to tip the Hero!
Gwip. Great tutorial here on using brushes to make a texture. Also a great brush download. Five Second Grunge Background.
BittBox: Great tutorial and brushes on making textures with brushes. Reverse Grunge.
French Kiss Collections: Try out my Free Grunge Brushes! I use them all the time. Also get brushes from the Shop.
Scanning
Your scanner is a great way to obtain textures. You’d be amazed what you can come up with when you look around with a new eye. Go wild. I’ve scanned my plastic Ikea chopping board, old books, old paper, fabric, vacuum cleaner filters, and old negatives.
A Few Tips
Scan with enough resolution to accommodate the size photographs you use. My Canon 40D shoots 3880 x 2592, so I make sure I have at least that much resolution.
If you are scanning something scratchy or rough, think of protecting your glass with a clear sheet of acetate.
If the item is bulky like a book, cover your scanner with a big piece of black fabric so you won’t have light leaks.
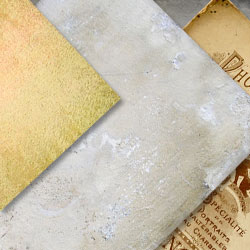
Examples of a few things I’ve scanned:
Old book cover

Old leather book cover scanned

Back of an old photo – scanned for edge detail

Scratched blank color negative scan
The above scan of a color negative was one of those clear frames where there had been no exposure. I wiped it down with a paper towel and alcohol to get the scratches.
Homework: collect items and scan them.
Photographs
Photographs are basically the same idea as a scanner, except it’s a lot easier to walk around with a camera than a scanner. (Kind of hard to fit stone walls on the scanner as well.) So the idea is either in your house or out on the street, go find texture. I advise you to look for things that have texture, but aren’t wild. The most useful textures – especially in the beginning are quite subtle. Some of the first things I ever shot were just too wild. While anything can be used, it will be easier to start with subtle textures.
Examples of suggested textures


Less useful textures.
In the beginning, I would avoid things with too strong of a pattern / color.

Marble photograph: Too strong of a pattern and color

Lichen photograph: Pattern too strong
A few tips for taking photographs:
Use a tripod and take the image straight on. If the camera isn’t parallel to the object, you will get distortion and out of focus areas. Don’t use a lens that is too wide as you will get distortion. I love my Canon EF-S 60mm f/2.8 Macro for textures. Make sure the lighting is even and not too strong or too dark. A lightly overcast day can be perfect for photographing. Do not use your flash.
Mix it all up
These are the raw materials. The real fun starts when you start to mix all this up.

Channels from stone photographs and brushwork
Note: if you are using textures solely for your own artwork, you can probably also use stock images that you’ve purchased. Look carefully at the terms of use. If you use them in textures that you share or sell, that could get dicey and I wouldn’t advise it.

American Photographer and Designer living in France with my French husband, 2 Weimaraners and Cat Rescues. Camera, Mac, studio, garden.

excellent post! Love those polder sky brushes and it’s good to see you playing with channels in that last texture.
I looked all over the place to try and find a nice scratched texture. Took all kind of pictures of weird things. And then I got to thinking. Well…what I finally did was scan in my old, old cookies sheets and jelly-roll pans which made the most awesome scratchy texture ever! Also just snapped a picture of my Wacom bamboo surface which was all scratched from my stylus and voila! Yet another really versatile scratched texture.
Excellent! Yes, that’s exactly what I mean about looking at things with a new eye. Channels are awesome. It’s a large part of the way I make my textures now, but want to get people started at the beginning. 😉
Note to beginners: If all this seems overwhelming, take just one section and start there.
Maybe don’t attempt the brushes yet. Start with scans. That’s probably the easiest place to start. Scan in some old book covers or old paper. Those are always useful. In the next posts, I’ll break the process down to smaller bites. I always have to juggle between those readers who are beginners and those who may be more experienced and want “more meat” to get going on.
Sometimes it is very useful and interesting to add a video to post, that makes your imagination process much more clear.
I agree. I will be adding video to the site soon. Thanks for your comment.
Hi Thanks for this really good tutorial, I have been wanting to start making my own textures for a while and now I know how to start!!!